
Milk Carton Prints
- Juli

- Jan 6, 2023
- 5 min read
Updated: Jan 7, 2023
I began to fall in love with the process of printmaking once I realised how loose the rules and boundaries were. I am yet to meet someone who feels that they can confidently define the word 'print', which brings about great freedom and invites creativity.
Since early woodblock printing during China's Han Dynasty (approx. 200AD), an uncountable number of techniques have arisen and evolved into what we understand as contemporary printmaking. From simply pressing leaves onto paper to print their vein patterns, to meticulously carrying out procedures involving flame and corrosive acid over the coarse of hours, the world of a printmaker knows no bounds.

With time, each artist develops their own dynamic list of favourite materials and rhythmic stepwise procedures. This tends to happen naturally, as they absorb and react to their creative surrounds, influence and mistakes.
Recently, I have really enjoyed using old milk cartons and juice boxes as the basis for my printing method. I'm taking you behind the scenes to expose exactly which materials I use to create my prints. Hopefully this can demonstrate the extent to which the process can be personalised, and inspire you to indulge in printmaking.
(As a disclaimer, none of the listed materials are a necessity for printmaking, they are simply the materials which I have been using recently, and I would encourage you to explore the possibilities of print with the resources available to you. Printmaking is much more about being inventive and resourceful, than about using the fanciest equipment).
Materials
A list of things that I like to use for milk carton printing...
Tetrapak

This is what's known as the matrix (the surface which will be manipulated before printing). Tetrapak can be found in milk and juice cartons, and has an aluminium layer covered in polyethylene, which creates an astoundingly good surface to etch into. The matrix is cut to shape with scissors.
I tend to drink a lot of milk when I am collecting tetrapak, and have had friends donate their old milk cartons too (a great way to recycle!).
Needles

I tend to keep my old etching needles,
whose head has become loose over time, so that I can build an array of tools which provide different gestural qualities in the linework. The newer tools are very precise and good for detail work. The older needles are less controllable, and are well-suited for creating textures.
Sandpaper

To accompany the needle's foundational linework, I like to add tonal variation with sandpaper. A coarser sandpaper is used to create large surfaces of confused lines (for example, I like to use it to create the illusion of grass). A second sandpaper with a finer grain can create surfaces covered in tiny lines which appear as a region with darker tone when printed (since ink is retained in these lines).
Stanley Knife

Useful for removing large areas of aluminium plating from the tetrapak surface, to create regions of dark tone (I like to use this trick when I'm etching windows or shadows).
Intaglio Ink
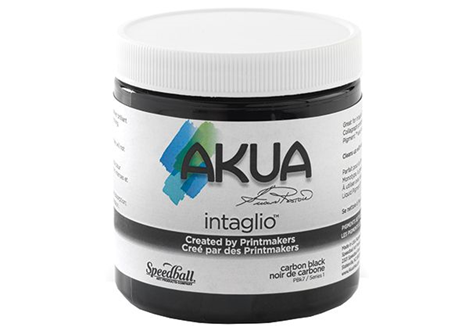
This is a beginner friendly soy-based ink. It is non-toxic, environmentally safe and designed to be easily cleaned with water. I may be biased since I haven't experimented much outside of this Akua brand, but it has always done the job well.
Toothbrush

A toothbrush can be used to apply ink to the tetrapak, pressing it into the etched lines in circular motions. I start with a small amount of ink at first and then add more as required, to minimise wastage.
Squeegee

This utensil is used to scrape ink from the surface of the matrix, and simultaneously press it deeper into the etched lines. I don't own a squeegee, and just use an old plastic membership card instead. The only thing to note, is to try and avoid having chips on the edge of the card, since these may transfer unwanted lines onto the tetrapak when scraping.
Tarlatan

A fabric with a coarse weave, I like to pull and twist it before use to try and soften it slightly. It can then be folded into a ball shape and used to remove further ink from the surface of the milk carton through gentle circular motion. At this stage, it is easy to accidentally remove ink from the linework, and using a flattened surface of the tarlatan ball to make contact with the matrix surface can prevent this.
Light news

I rip this utility paper into small scraps which are used to wipe off any excess ink from the milk carton surface. By using a flat palm against the paper, you can ensure that no ink will be removed from the lines.
Press

This is a 15-inch hobby press, suitable for amateur printmakers. The horizontal panel is made from high density fibreboard with a laminate coating. I have secured a layer of thin plastic layer (made from cutting up an old plastic bag) across this board, to protect it from ink. I also like to place a sheet of paper underneath it, wear I can mark out where the matrix will sit in relation to the paper, to align the two.
Atop the panel sit two layers of felted press wools. They provide a cushioning between the plate and press roller. Depending on the type of printmaking being performed, a different combination of blankets may be suitable. I have always used a 3mm layered closest to the etching plate, with a 6mm blanket above it. For particularly fine detail, a third 1.5mm layer may be added to encourage all ink to print from the linework onto paper.
Remember! There are plenty of printmaking techniques which don't require a press, and I will discuss some of my favourites in upcoming posts.
Paper

You can spend a fortune on the most beautiful papers, but I tend to choose the weaves that slightly more affordable, especially when I am trialling out a new print. I have been really pleased with the results from white Fabriano Rosaspina etching paper (200gsm, 60% cotton). It has a neutal pH which is compatible with intaglio ink and is quite soft. Before printing, I soak it in room temperature water, and dry it with an old towel, for ultimate ink absorption.
I'm yet to properly experiment with paper, and would like to find a cheap paper that produces beautiful outcomes in the future.
Hopefully this list has given a bit of an insight into intaglio printmaking on tetrapak. It feels materialistic to just talk about such tangible things when the creativity and imagination behind a print are far more intriguing to me. But I hope that some of these tips were helpful, and that I can encourage someone to upcycled their old milk cartons.
Happy printing!
Juliana

Comments